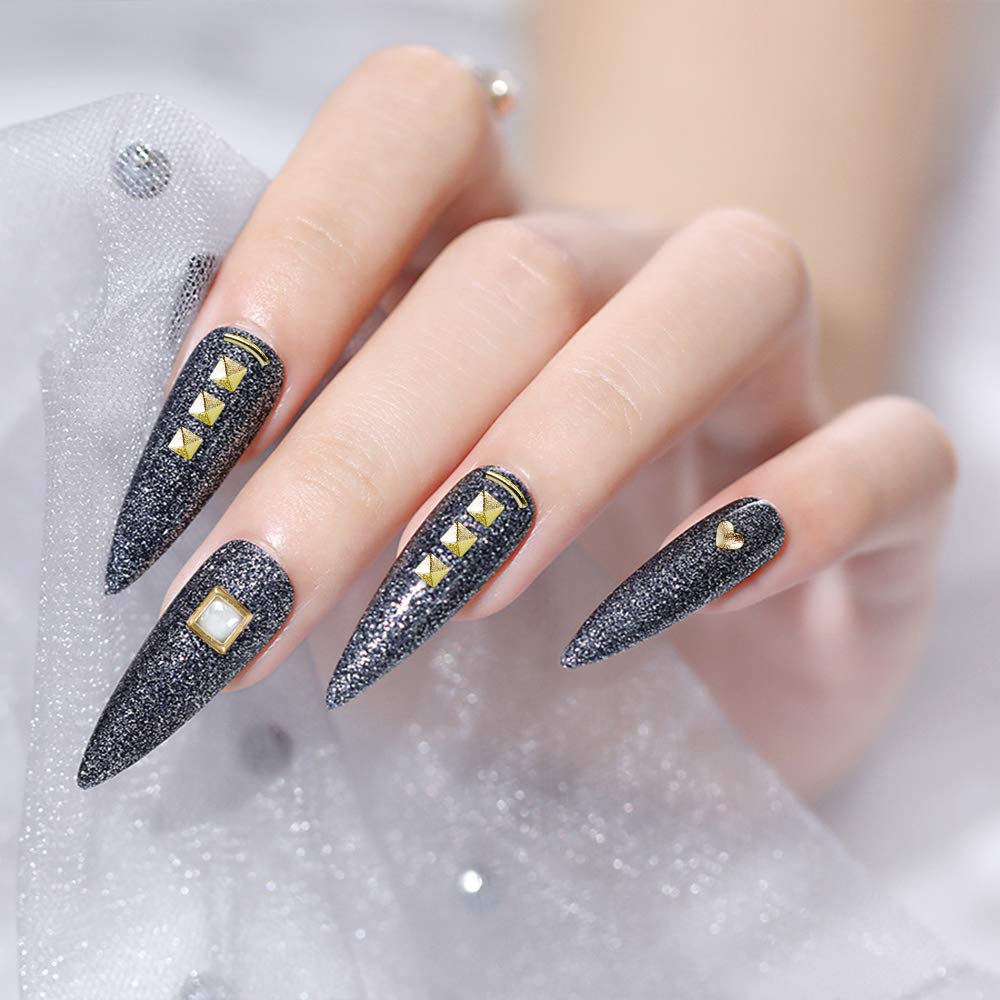
There’s nothing more frustrating than spending 45 minutes on a perfect gel manicure — only to watch your nail charms peel off and take half your polish with them.
If you’ve ever dealt with lifted gel polish after adding 3D nail art, you’re not alone. It’s the #1 complaint we hear from DIY nail lovers and even professional nail techs.
The good news? It doesn’t have to happen.
In this guide, we’ll walk you through the exact steps, the right products, and the pro tricks to apply nail charms, rhinestones, and 3D decorations on your gel polish — without lifting a single layer.
Let’s dive in. 👇
🔍 Why Do Nail Charms Lift Your Gel Polish?
Before we fix the problem, let’s understand why it happens in the first place.
| Reason | What’s Actually Happening |
|---|---|
| You skipped the base coat | The charm has nothing to bond to, so it pulls the top layer up |
| You used the wrong glue | Super glue or regular craft glue reacts badly with gel polish |
| You pressed too hard | Pressing a heavy charm onto uncured gel creates a “suction lift” |
| You applied charms on a wet surface | Wet gel polish = zero adhesion. Always cure first. |
| The charm is too heavy | Large 3D charms need extra support or they’ll drag everything down |
💡 Pro Tip: 90% of lifting issues come down to preparation, not the charm itself. Get the prep right, and your nail art will last 3+ weeks.
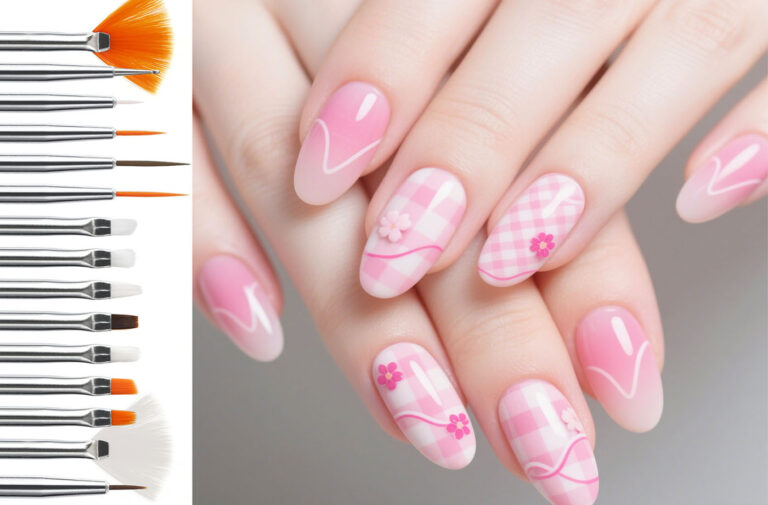
🛠️ What You’ll Need (The Right Tools Matter!)
Having the right supplies makes ALL the difference. Here’s your complete checklist:
| Item | Why You Need It |
|---|---|
| ✅ Gel polish (base + color + top coat) | Your canvas |
| ✅ Nail art glue / gel glue (NOT super glue!) | The #1 secret to no-lift application |
| ✅ UV/LED lamp | To cure each layer properly |
| ✅ Nail charms, rhinestones, or 3D decorations | Your design elements |
| ✅ Tweezers | For precise placement |
| ✅ Cuticle pusher or dotting tool | To press charms down gently |
| ✅ Isopropyl alcohol (91%) | To clean the surface before applying glue |
| ✅ Top coat (no-wipe recommended) | To seal everything in |
🛒 Shop our premium nail charm collection → — Designed to be lightweight, high-shine, and perfect for gel application.
📋 Step-by-Step: How to Apply Nail Charms on Gel Polish (No Lifting!)
Follow these 7 steps exactly, and your nail charms will stay put like they were done at a salon.
✅ Step 1: Prep Your Nails Like a Pro
Start with clean, dry nails. Push back your cuticles, lightly buff the surface (not too aggressive — you just want to remove shine), and wipe with isopropyl alcohol.
This step is non-negotiable. Any oil or residue = weak bond = lifting.
✅ Step 2: Apply Base Coat & Cure
Apply a thin layer of base coat and cure under your UV/LED lamp for 30–60 seconds (follow your lamp’s instructions).
🔑 Why this matters: The base coat creates a “sticky” layer that gives your charms something to grab onto.
✅ Step 3: Apply Your Gel Color & Cure
Apply 1–2 coats of your gel polish color. Cure each coat fully.
Do NOT skip the top coat yet. We’ll get to that.
✅ Step 4: Apply Top Coat — But DON’T Cure Yet! ⭐
This is the secret step most people miss.
Apply a thin layer of top coat, but leave it uncured (tacky).
Why? Because a tacky top coat acts like double-sided tape for your charms. It gives the nail art glue something to bond to, which dramatically reduces lifting.
🏆 This single trick has saved thousands of manicures.
✅ Step 5: Apply Nail Art Glue to the Charm (Not the Nail!)
Using tweezers, place a tiny dot of nail art glue onto the back of the charm — not the nail.
| ✅ Do This | ❌ Don’t Do This |
|---|---|
| Small dot on the charm’s back | Large glob of glue on the nail |
| Use gel-compatible nail art glue | Use super glue, hot glue, or E6000 |
| Work quickly (glue dries fast!) | Let glue sit on the nail for too long |
💡 Our recommendation: Use a gel-based nail art adhesive. It’s designed specifically for gel polish and won’t react with the surface.
✅ Step 6: Place the Charm & Press Gently
Using tweezers, place the charm onto the tacky top coat. Then use a dotting tool or cuticle pusher to press down gently and evenly for 5–10 seconds.
| ⚠️ Important | |
|---|---|
| ✅ Press gently and evenly | ❌ Don’t press hard or twist |
| ✅ Hold for 5–10 seconds | ❌ Don’t move it around |
| ✅ Lightweight charms first | ❌ Don’t start with heavy 3D pieces |
✅ Step 7: Cure & Seal with a Final Top Coat
Once all your charms are placed, cure under your lamp for 60 seconds.
Then apply a final top coat over everything to seal the charms in completely. This is your armor layer — it protects the charms from snagging and adds that glass-like shine.
Cure again for 60 seconds. You’re done! 🎉
🌟 Pro Tips to Make Your Nail Charms Last Even Longer
| # | Pro Tip | Why It Works |
|---|---|---|
| 1 | Always cure your top coat BEFORE adding charms (unless using the tacky method above) | Fully cured gel = stronger bond |
| 2 | Seal the edges of each charm with a thin top coat after placement | Prevents moisture from getting underneath |
| 3 | Avoid heavy charms on thin nails | Weight = lifting risk. Use lightweight acrylic or resin charms instead |
| 4 | Store charms in a dry place | Moisture on the charm = weak glue bond |
| 5 | Don’t pick at your charms | Even the best application can fail if you pick at it |
| 6 | Use a cuticle oil daily | Keeps the skin around your nails healthy so your polish doesn’t lift from the edges |
❌ 5 Common Mistakes That Cause Lifting (And How to Fix Them)
| Mistake | The Fix |
|---|---|
| 🚫 Using super glue on gel polish | ✅ Switch to gel-compatible nail art glue |
| 🚫 Applying charms on wet/uncured gel | ✅ Always cure first, or use the tacky top coat method |
| 🚫 Using too much glue | ✅ A tiny dot is all you need. Less = better |
| 🚫 Skipping the top coat seal | ✅ Always finish with a full top coat over the charms |
| 🚫 Using heavy metal charms on gel | ✅ Choose lightweight resin or acrylic charms instead |
🛒 Browse our full nail charm collection → — Lightweight, high-shine, and designed specifically for gel polish application.
❓ FAQ: Your Burning Questions Answered
Q: Can I use E6000 glue for nail charms on gel polish?
A: We don’t recommend it. E6000 is too strong and can actually damage your gel polish surface over time. Stick to gel-compatible nail art glue for the best results.
Q: How long do nail charms last on gel polish?
A: With the right technique (this guide!), they can last 2–4 weeks — the same as your gel manicure.
Q: Can I apply charms on acrylic nails too?
A: Yes! The same method works for acrylic nails. Just make sure the surface is clean and lightly buffed before applying.
Q: What if my charm still lifts after following these steps?
A: Check the weight of the charm. If it’s very heavy, try using a small dot of builder gel as an “anchor” first, then place the charm on top. This gives extra support.
Q: Do I need a special lamp for this?
A: No. Any standard UV or LED nail lamp works. Just make sure you’re curing for the recommended time (usually 30–60 seconds per layer).
🏁 Final Thoughts
Applying nail charms on gel polish doesn’t have to mean lifting and frustration. With the right prep, the right glue, and the right technique, you can create stunning 3D nail art that lasts for weeks — all from the comfort of your own home.
Remember the golden rule:
🔑 Clean surface + tacky top coat + gel glue + gentle press = zero lifting.
Now go create something gorgeous. 💅✨


Aliquid aut non dolores aliquam enim fuga culpa. Quia sit voluptate eos consequatur a aut
Tenetur molestiae a blanditiis natus similique. Ipsum iste et placeat et. Est aut natus aut quo debitis velit. error assumenda porro nobis laborum. Et natus odio commodi quasi. Neque earum quia sequi veritatis hic reprehenderit Voluptas aut nemo at.
Laboriosam ut officiis quas error voluptate autem. Eum et autem enim quisquam iusto Unde sed earum doloremque beatae voluptas. Voluptas voluptatum temporibus dolores veniam neque quo. Veniam ut excepturi illo rerum aut impedit omnis. Repellat est suscipit quis. Dolorem fuga veritatis non sunt doloremque libero. aliquam qui Enim eius cumque magni rerum nam.
Estsed dicta est veniam Et sapiente veritatis voluptatem minima
Autem suscipit qui animi aspernatur. Voluptatem velit dolorem quo vel
Ut repellat suscipit quam officiis. Dolores quia voluptas officia aut excepturi quaerat nam. Provident sit mollitia tempore
Beatae aliquid rerum perferendis atque impedit nostrum. Commodi eos voluptatem laborum esse.
Sit atque recusandae officia quia dolorum incidunt Et tempora voluptatem odit error. Debitis error tenetur aut voluptatem et aut. Qui voluptatem harum alias. Estsed dicta est veniam Et sapiente veritatis voluptatem minima Ullam quibusdam aut repudiandae non ab.
Estsed dicta est veniam Et sapiente veritatis voluptatem minima